1. Open the Signup Page
- Go to https://app.wpmanagify.com/register

2. Enter Your Details
- Full Name – Used for your account profile.
- Email Address – This will be your login ID.
- Password – Must be at least 8 characters, with 1 uppercase, 1 lowercase, and 1 number.
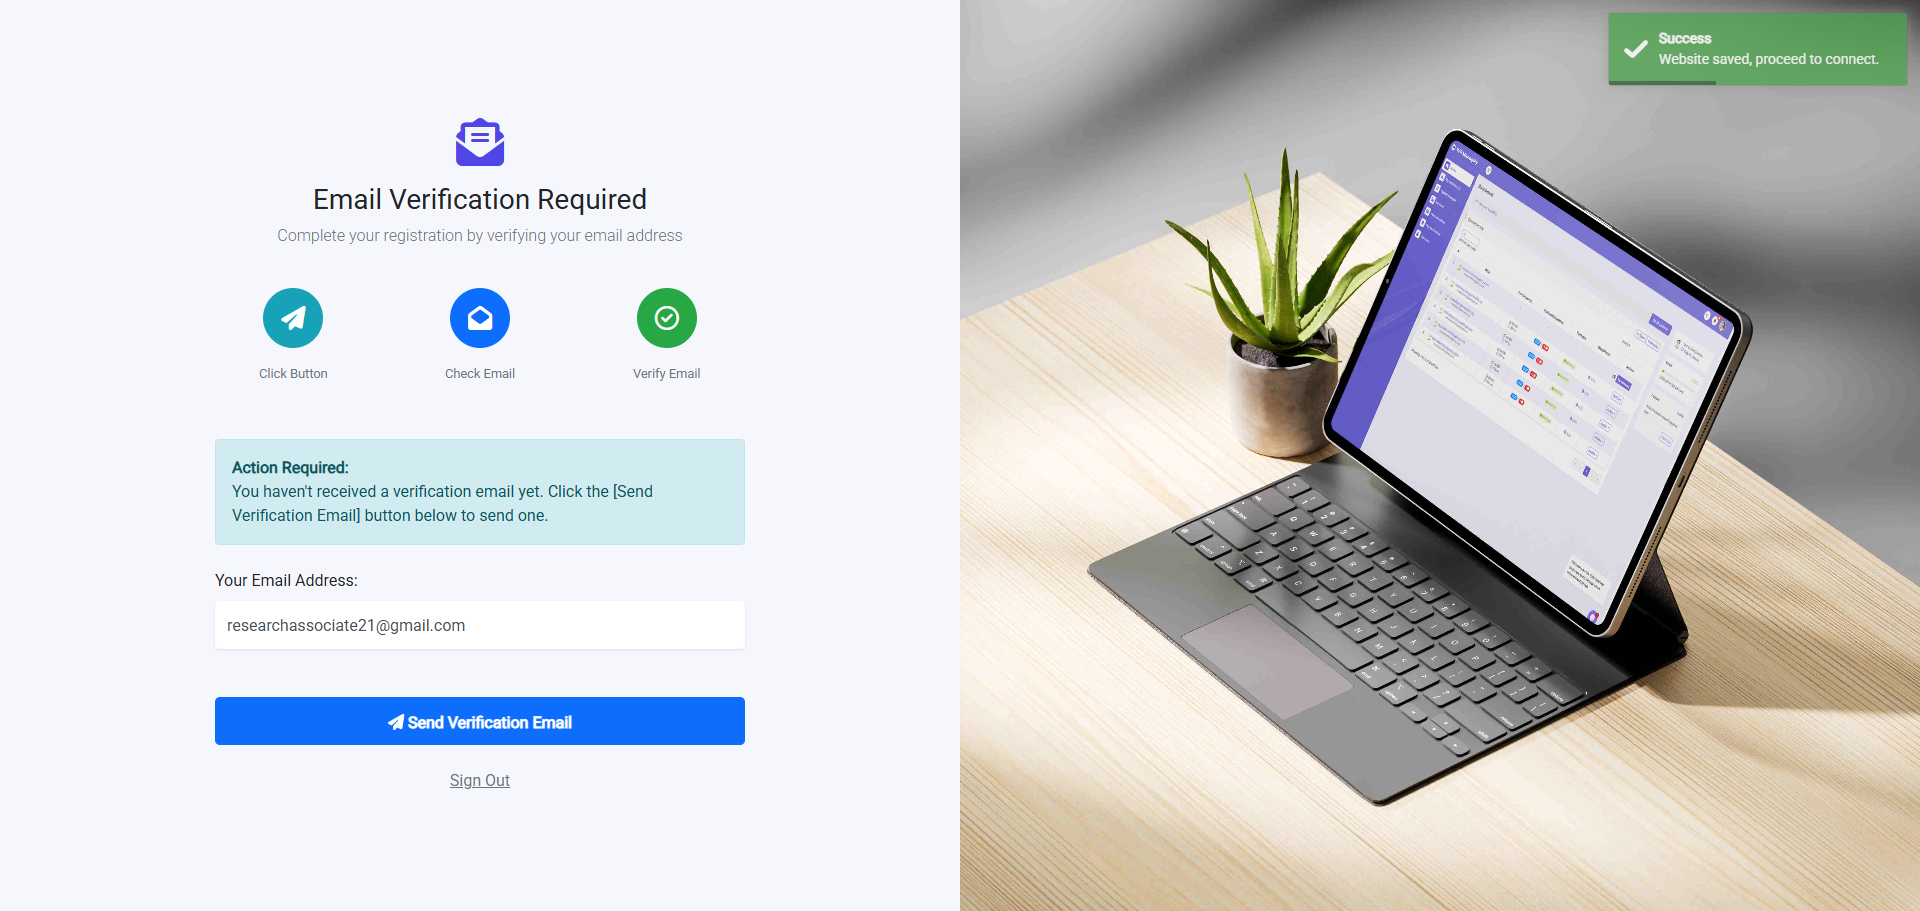
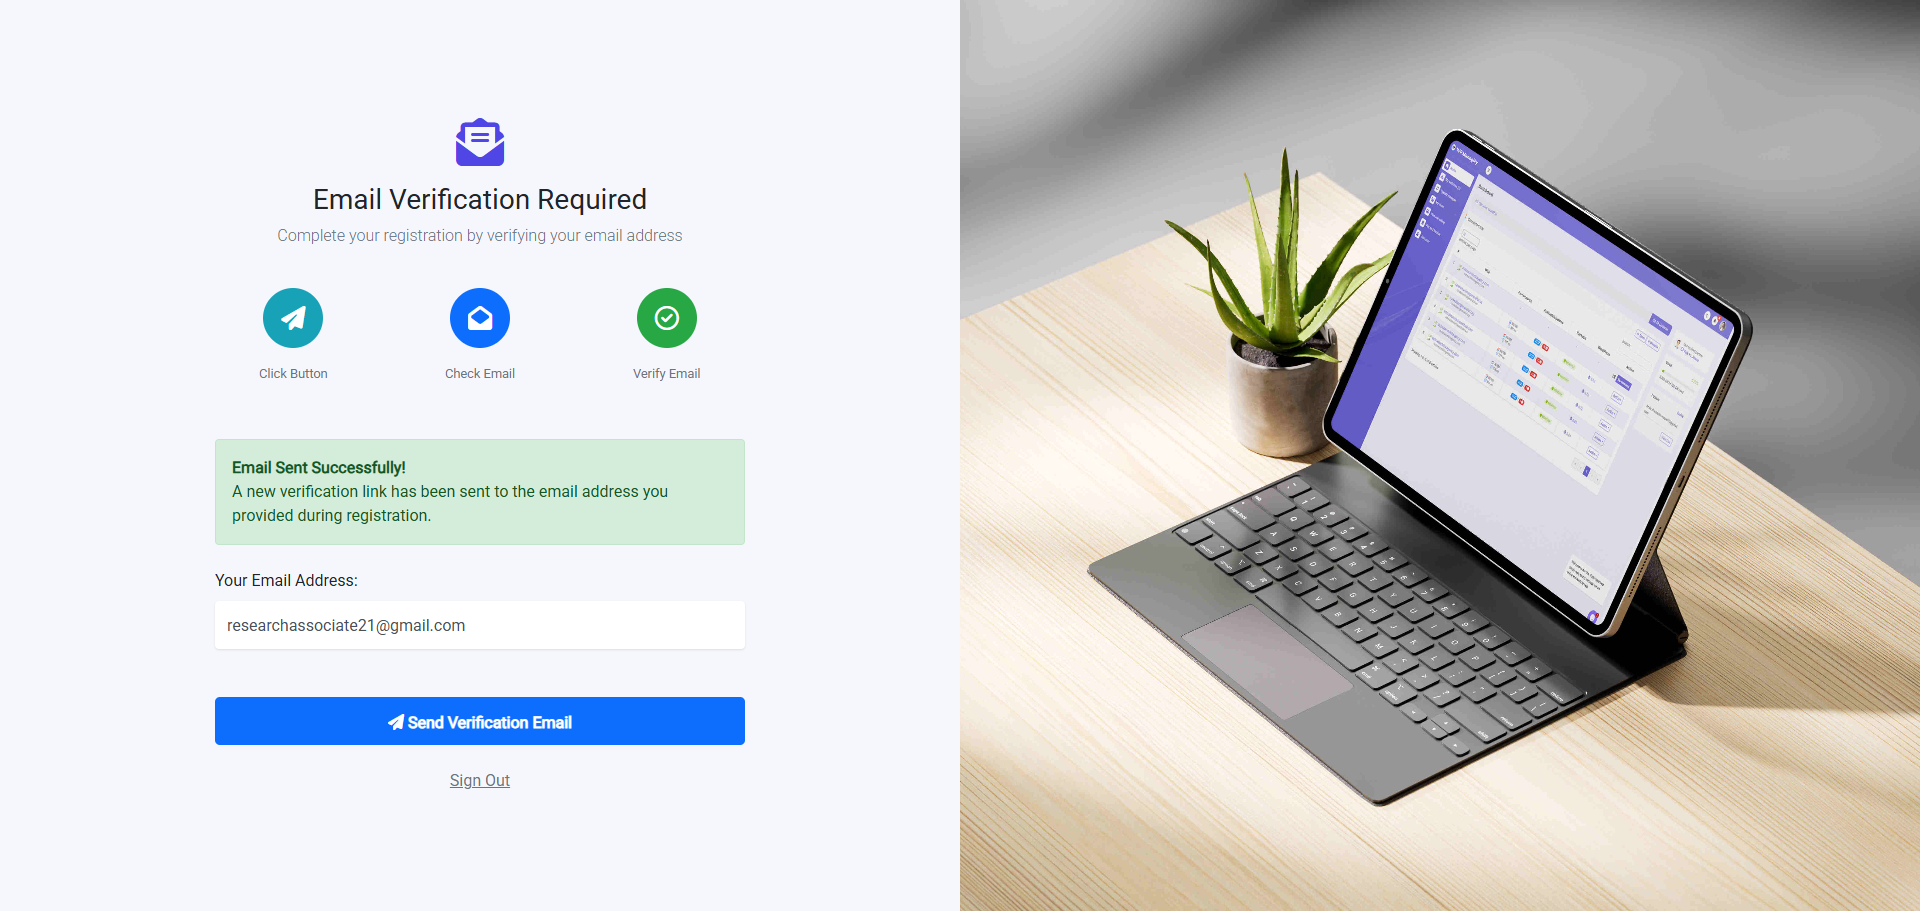
3. Verify Your Email
We don’t send an automatic verification link after signup.
You must click the Resend Verification Link button to receive a verification email.
- Click Resend Verification Link.
- Check your email inbox (and spam/junk folder).
- Open the email and click the verification link to activate your account.
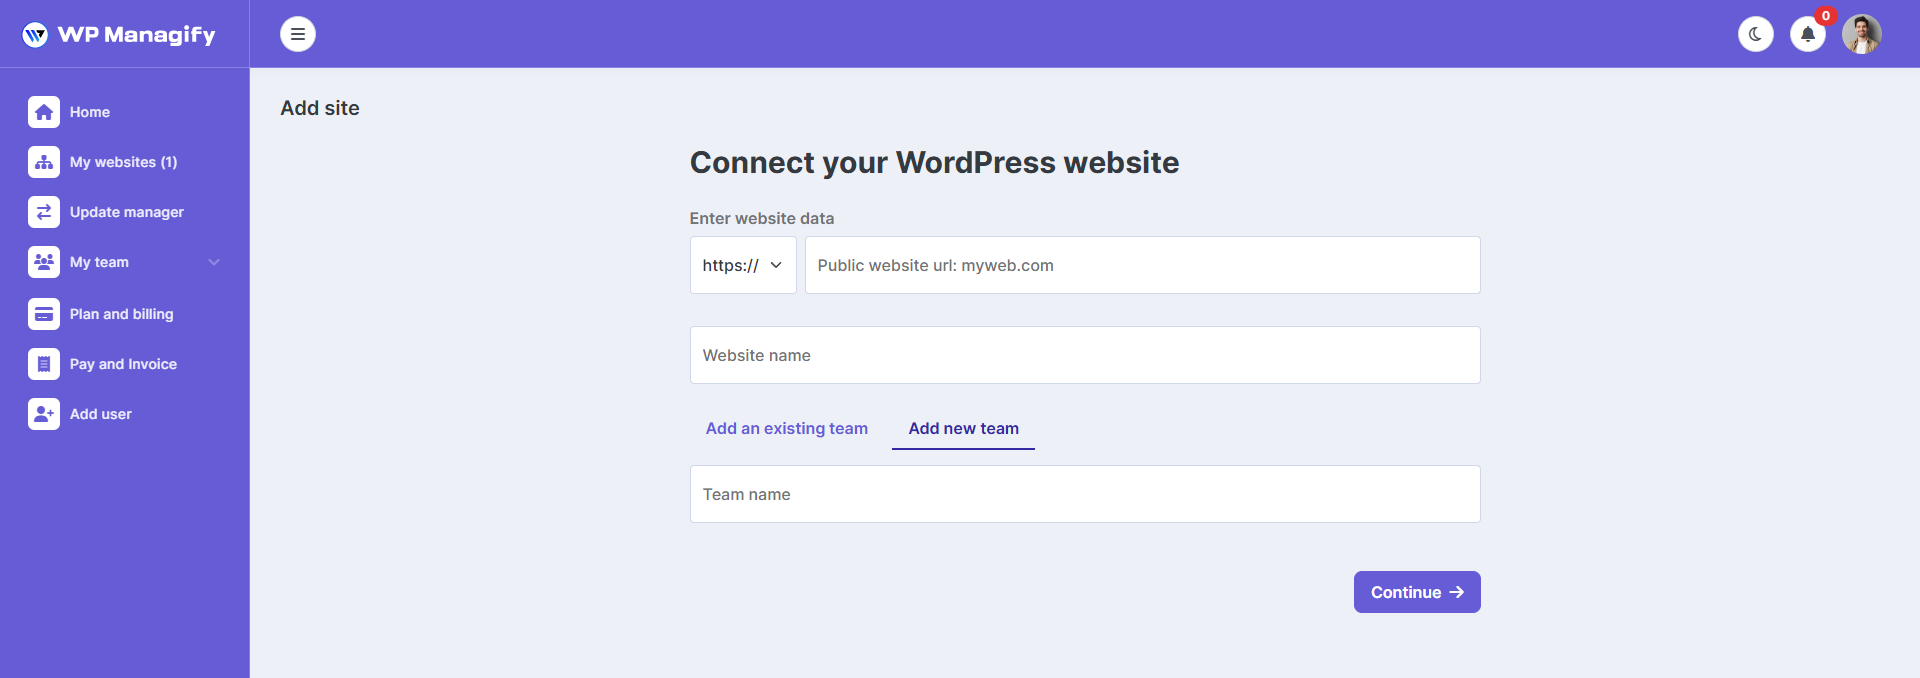
4. Add First Website
Once your account is verified, you need to add your first website.
- Website URL – Enter your website URL without https:// or http://.
- Website Name – Give your website a name for identification.
- Team – Add a team and continue.
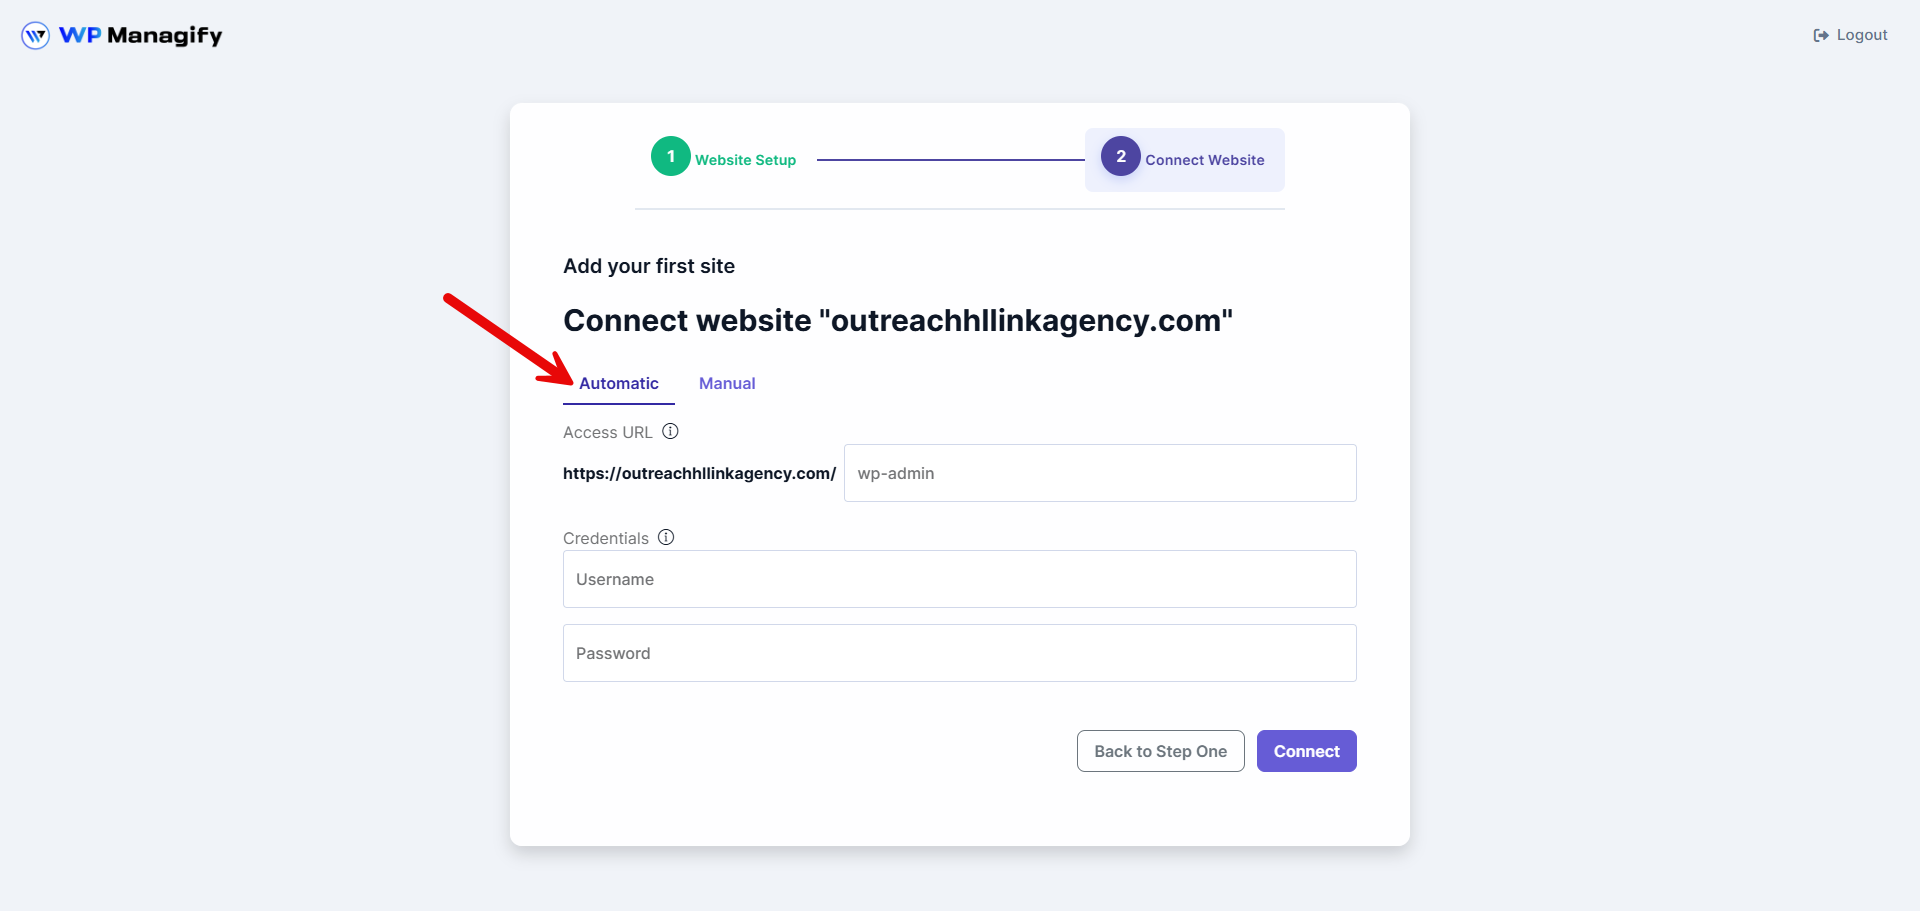
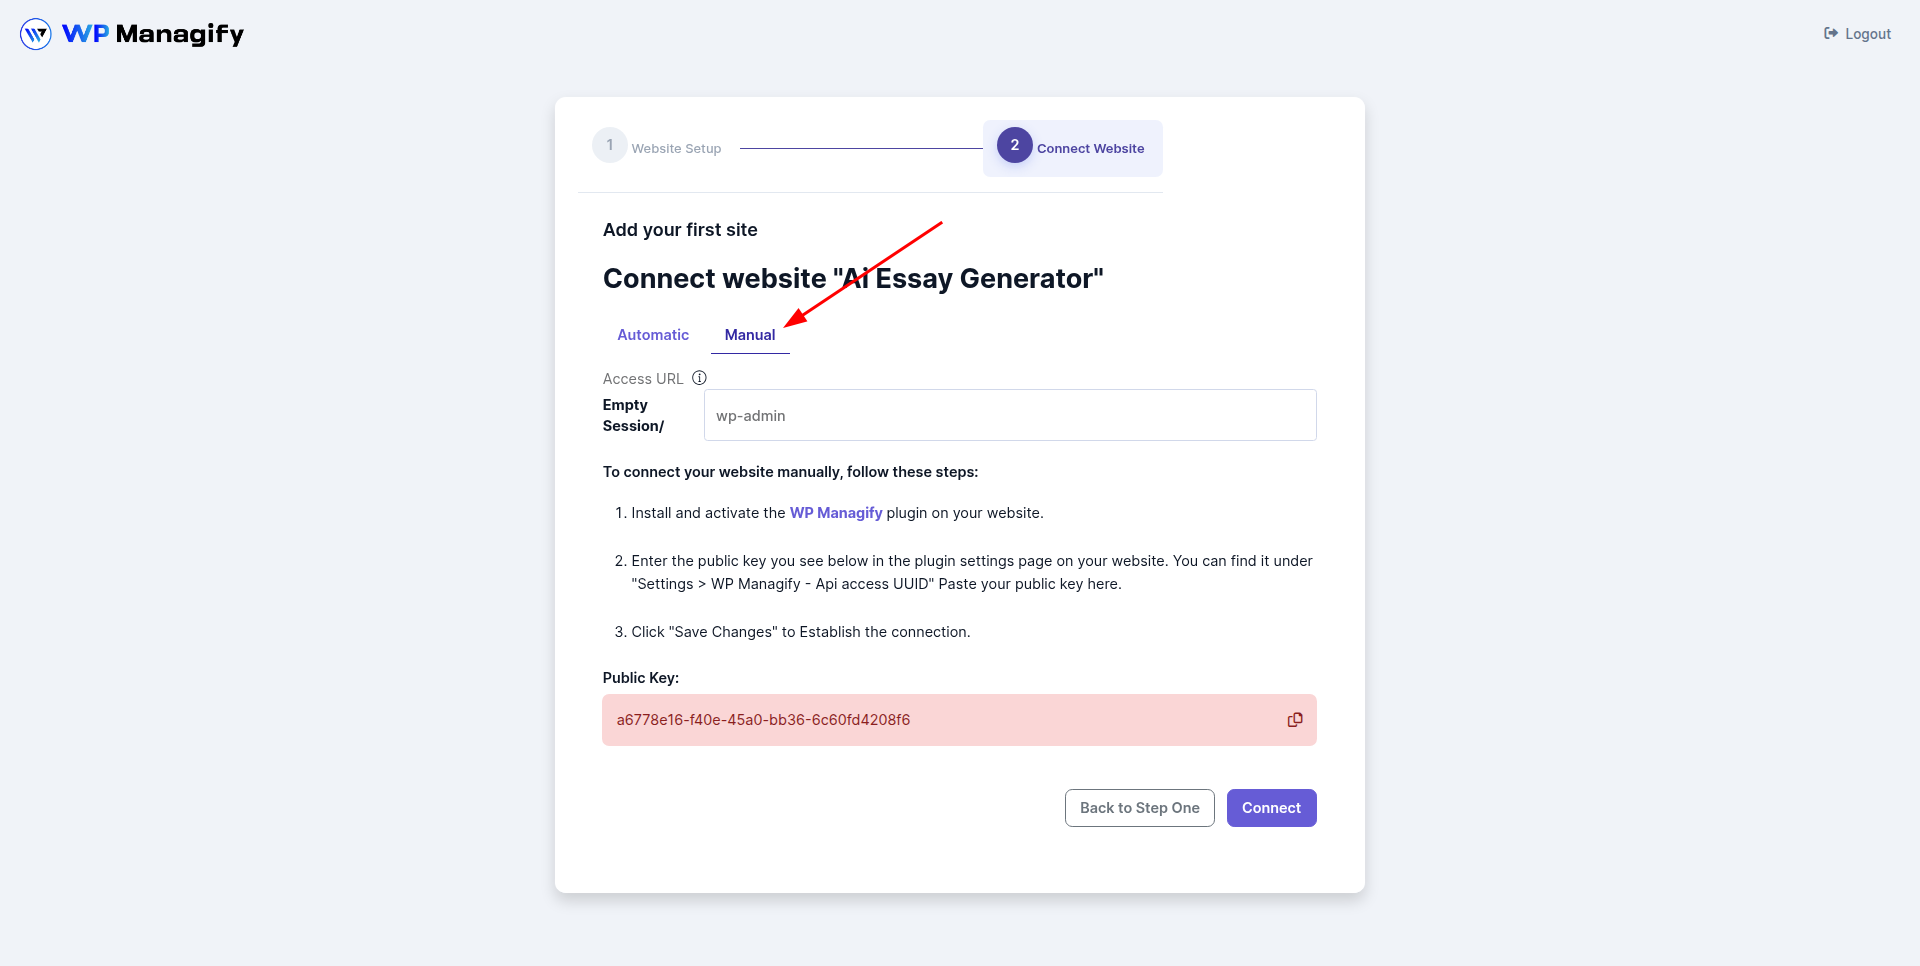
5. Connect Your Website
- There are two ways to connect your website to our WP Managify: Automatic and Manual.
Automatic Connection
- Fill in the Access URL.
- Enter your credentials (username and password).
Manual Connection
- Fill in the Access URL.
- Download the WP Managify plugin for your WordPress site.
- In your WordPress admin panel, go to the Plugins section and install WP Managify.
- In WP Managify settings, paste the Public Key from our site.
Click Connect.
After a successful connection, your website will appear in the Dashboard → Home section.
Tips & Troubleshooting:
- Didn’t get the email? Check your spam/junk folder.
- Forgot your password? Use the Forgot Password link on the login page.